I am not a very confrontational person. I have to be really upset about something to make a stink (unless it involves my kid...then I am fierce just like any of you would be). So here's the thing: I bought a couple packs of Huggies diapers last month for Daughter to wear at night. She is 99% potty-trained - we put a dipe on her at night for insurance but it is usually dry in the morning.
A few weeks ago I was doing the laundry and I noticed a funny shadow-like discoloration inside a light-colored sleeper. A nice, soft, sweet CARTER'S sleeper, which I fully intend to re-use for a future child and possibly pass on to family or at least charity when we are done with it. I unzipped it to see what was what, and the whole bottom area of the sleeper had a greenish cast to it.
The diapers I had purchased are printed with green ink. They have Winnie the Pooh designs on them, but the majority of the ink is green. It is rubbing off all over Daughter's pajamas. I have since checked her other sleepers and the flannel pjs I made her, and they ALL have green bottoms now. This is not an issue of a wet leaky diaper, because as I said, she has been waking up bone dry. This is obviously an issue of defective ink or something on Kimberly-Clark's end.
What the .....?!?
So I wrote to them. Oh yes I did. I filled out a comment form and I said, as politely as possible, that it will be a cold day in hell when I buy their diapers again, as I don't want all our baby clothes to be ruined. Who wants hand-me-down baby clothes - even those in perfect condition - with green bums? YUCK.
And yes, I have tried OxyClean, spray pre-treaters, Borax, and a couple of different brand-name detergents, all to no avail. The sleepers and pajamas are stained and that's that.
I would love it if they would send me a stinking check to replace the 4 pieces of ruined sleepwear, but who wants to bet they just send me a bunch of coupons for more Huggies?
Monday, March 31, 2008
Thursday, March 27, 2008
quickie
This week is threatening to pull me under, but I wanted to pause and at least show Daughter's Easter dress in action. Sorry these pictures are somewhat crummy, but 3 year olds don't tend to be still for long. I did my best!
Here's the front:

I found last year's slip in her closet and I was psyched that I didn't have to make a new one, until I put it on her Easter morning and remembered that it comes up too high at the neck. Sticks out of every dress she owns (because I just used a jumper pattern to make it....duh). Don't mind that alien arm thing, please. Also note the yarn in the foreground. There is always knitting lying around somewhere.
Here's a view of the back, sort of. Like many kids, my child is extremely musical and LOVES to bang away on the piano. Anyhoo, the buttons down the back of the dress are the same pink as the ribbon.

At no point in the day was I able to get a full shot of the dress from the front, but I will try again another day. She was so cracked out on candy I could barely get any shots of her at all. She was whizzing around like the Tasmanian devil. Thanks, Easter bunny! She really needed 4 - count 'em 4 - Easter baskets. Fan-freaking-tastic.
Mmmmmkay, now I have to pay bills (if I can unearth them from the piles of crap on the counter), iron twelve thousand shirts, clean the floors before the dust bunnies attack, scrub the bathroom as the crud in there is achieving sentience as I type, procure toilet paper before we have a crisis, and prep & cook a chicken for dinner. It's already 2:45. Awesome.
Friday, March 21, 2008
just 'cause it looks easy...
...doesn't mean it is.
This dress is killing me softly.

It doesn't look like a killer, does it? No, it looks so sweet and innocent. But it is not.
I've been really struggling my way through assembling this silly thing, realizing as I go along that I rely VERY heavily on those step-by-step instructions you see in American sewing patterns. I guess I truly am a visual learner (which, yes, I totally know about myself), and that combined with the extremely vague instructions for this garment causes some real chaos in my wee brain.
This is being saved from the bin by my love of the color and my hatred of wasting fabric, so I'm pressing on with the finishing. The collar is only basted on in this photo, and I'm currently struggling with the "instructions" for the collar binding. I get the idea of what they want me to do...I'm just not exactly sure how to execute it. I'm sure if I dedicate some time to reading it carefully and playing with the pieces, I'll manage it.
Then I'll need to finish the facings, hem the body and the sleeves (they are raw, which is why they look so weird in the picture), and add buttons and buttonholes. I did not bother to finish any of the seams, so this will surely end up a raveled mess on the inside after a few wears and washes. OH WELL.
I'm not even sure how this is going to work for Daughter. Right now I'm afraid it's going to look like a baggy coat with short sleeves. I guess it will at least make an ok playdress.
Anyway, on a lighter note, I want to wish everyone a Happy Easter if you celebrate it. Enjoy the holiday, and here's hoping we all have a beautiful, sunny weekend!
Wednesday, March 19, 2008
more spring/summer sewing for Daughter
I got a good start on Daughter's blue dress today. It was cold and pouring rain and the ground was covered in pea-soup fog, so it was a good day for some sewing.
The pieces were already cut and marked, so I started with interfacing the plackets and collar. I chose to use a slightly heavier interfacing than I usually do - typically I use Pellon featherweight fusible, because I sew mostly lightweight cottons, but the one I used for this linen was a tad more stiff to give the linen some body (still fusible).
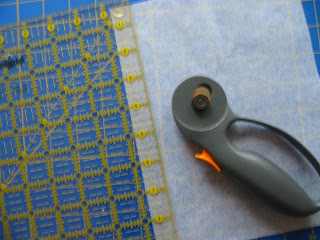
Because I only needed to interface a tiny strip of the fashion fabric, I decided to use my rotary cutter and ruler to slice up the interfacing:
Easy peasy!
Once the pieces were cut, I fused them to the edges of the front skirt sections:

Then I turned the plackets under on both bodice pieces and both skirt pieces:

All I managed to do after that was gather the skirt sections and sew them to the bodice pieces, because my mom called and we yakked it up for the rest of naptime.

I really, really promise that those gathered seams are straight in real life. Something about the angle of the camera makes them look crooked. Hopefully when I show the finished garment they will look better.
I must mention that my new favorite thing is topstitching. Lots of Ottobre patterns call for some serious topstitching, and it makes a HUGE difference in the finished garment. The seams lay nice and flat, and the garment looks much more professional and less "homemade." I love it, love it, love it and plan to incorporate it into more future garments...even though it hogs thread!
Next technique to try: binding seam allowances. My serger seems to be seriously dead now...I do not know what happened between projects but suddenly it is just chewing up my fabric and it looks like the thread threw up all over the place. Disaster. I'll be starting a change jar to collect up some money for a new one (ha! I'd better get a job). In the meantime I have to use some other techniques to avoid ravelly messes inside my garments. I'm pondering using thin bias strips of something lightweight (batiste?) to do something like a Hong Kong finish on the shoulder and side seams of this dress. I don't know if it will work or not. I just want something a little nicer than zig-zagging the edges. Thoughts, anyone?
The pieces were already cut and marked, so I started with interfacing the plackets and collar. I chose to use a slightly heavier interfacing than I usually do - typically I use Pellon featherweight fusible, because I sew mostly lightweight cottons, but the one I used for this linen was a tad more stiff to give the linen some body (still fusible).
Because I only needed to interface a tiny strip of the fashion fabric, I decided to use my rotary cutter and ruler to slice up the interfacing:

Easy peasy!
Once the pieces were cut, I fused them to the edges of the front skirt sections:

Then I turned the plackets under on both bodice pieces and both skirt pieces:

All I managed to do after that was gather the skirt sections and sew them to the bodice pieces, because my mom called and we yakked it up for the rest of naptime.

I really, really promise that those gathered seams are straight in real life. Something about the angle of the camera makes them look crooked. Hopefully when I show the finished garment they will look better.
I must mention that my new favorite thing is topstitching. Lots of Ottobre patterns call for some serious topstitching, and it makes a HUGE difference in the finished garment. The seams lay nice and flat, and the garment looks much more professional and less "homemade." I love it, love it, love it and plan to incorporate it into more future garments...even though it hogs thread!
Next technique to try: binding seam allowances. My serger seems to be seriously dead now...I do not know what happened between projects but suddenly it is just chewing up my fabric and it looks like the thread threw up all over the place. Disaster. I'll be starting a change jar to collect up some money for a new one (ha! I'd better get a job). In the meantime I have to use some other techniques to avoid ravelly messes inside my garments. I'm pondering using thin bias strips of something lightweight (batiste?) to do something like a Hong Kong finish on the shoulder and side seams of this dress. I don't know if it will work or not. I just want something a little nicer than zig-zagging the edges. Thoughts, anyone?
Tuesday, March 18, 2008
in which i find out i'm not so smart after all
Once you've been in the online sewing world for a little while, you start to realize that many home sewers (or sewists, as some call themselves) pooh-pooh the "Big 4" pattern companies (Simplicity, McCall's, Butterick, and ? what's the fourth?) and instead create garments from European patterns.
These patterns seem to be more tailored to actual human bodies and come in lots more modern, hip designs. We're talking about Burda, for example. In many cases you are required to do things like add the seam allowances (where the American pattern companies print the seam allowances right on the pattern pieces), and while this seems like a pain in the booty, it's actually good in cases where you need to do alterations (or so I've read...I've never once attempted a pattern alteration).
One such European company is Ottobre Design. They make patterns for women and children, but it's the designs for children that blew me away. LOTS of home sewing mamas use this source, so I decided to give it a try. I figured I've been sewing long enough and made enough different patterns that I could certainly figure out these Euro patterns.
First of all, this gorgeous book of patterns is hiding an ugly secret:

This is what one of the 6 pattern sheets looks like. Is that not enough to make you want to poke your eyes out? You have to get out your pattern ease and a marker, sit in a very well-lit room, and carefully seek out and trace the correct pattern pieces in the correct size. By color. Oh my peas. It is ridiculous. But I did it, because dang it, I was going to make my Daughter some adorable Euro clothes!
I went to Joann's on Sunday for a shot of inspiration. There, I ran into my first roadblock. The entire book is in metric. I mean, duh, of course, it is European. I should have done a little prep work at home to determine how much yardage I would need for the designs I was planning to make.
I got through it, and came away with a plan:

Fabric for 3 pairs of cropped summer pants and linen for a dress.
The pants:

Two cuts of embroidered twill, and one of denim weaver's cloth.
The dress:

Linen in the prettiest blue I've ever seen. Daughter has blue eyes, so I like to make blue clothing to set them off.
Well, I got the patterns traced and cut out, as you can see in the photo above. Then I went to bed because after all that tracing and marking I was losing my mind. And my eyesight, I think.
Yesterday I began sewing, starting with the pants. Next roadblock: these patterns come with approximately 10 lines of directions. The gist is this: "sew garment together."
So I did:

I did ok, until I got to the outside leg seams. The pattern pieces include a mock vent piece that extends out from the leg. I wish I'd taken a photo if it before sewing. I had NO IDEA what to do. I can sew a real vent. But how to you sew a mock vent? The instructions were so very, very vague that I spent a full half-hour flipping back and forth from the instructions to the picture of the finished pants, trying to get a clue. I searched my sewing reference books. I looked on the internet. Nothing.
I finally quit, and I swear I laid in bed thinking about it for hours. I just have no idea what they wanted me to do. I still don't. I faked it.

I sewed the entire side seam, then folded the seam allowance and vent extensions forward (inside the leg) and topstitched over them. They still need two buttons sewn on to complete the vent illusion. That horizontal topstitched seam is supposed to be there - you cut the pattern piece off, make a separate bottom panel, and sew it back on for design interest. That part was no problem. But that damn mock vent...I hope I can figure it out because I want to make more of these! Oh, and the hem is straight. Through the magic of photography, it looks wonky. I assure you, it's fine.

For the pockets, rather than turning under the seam allowances I chose to line each with batiste and turn them, because the bottoms are curved. I knew I'd make a giant mess of it if I tried to turn those under. Plus a lined pocket should be stronger, right? Daughter likes to pick up all kinds of sticks and rocks and crap outside, and all that will probably end up in these pockets.
Part of what screwed me up on these pants (besides hubris) was the fact that I chose not to add seam allowances to my pieces. I took the advice of others I've read about on the 'net and simply cut a larger size, then sewed with a regular 5/8" seam allowance. This worked for the most part, especially because Daughter is so petite and thin. However, it seems to have messed me up in the waistband area. The directions call for wide elastic, and the picture shows a wide waistband. I ended up with a puny casing that will only hold very narrow elastic. I need to try these on Daughter when she gets up...I'm hoping the elastic waist will be comfortable enough. I guess on the next pair I will add length at the waist to accommodate a much wider casing.
So it turns out I don't know as much as I thought I did. I'll be trying again, though. Stay tuned for the continuing saga. I'll be trying the dress next. I need a little break from these pants.
Monday, March 17, 2008
beat THIS
So yesterday (Sunday) morning I schlepped out of bed and got Daughter up. She padded off to the corner of the sofa to veg and suck on her fingers, and I put on my coat and shoes (over my moose pajamas...hawt!) to get the newspaper from the mailbox. I was outside for maybe twelve seconds. When I came back in Daughter was kneeling up on the couch and fully awake. This is what she said to me:
"Mommy! Did you see that chipmunk?!?"
Now, I was still kind of in half-asleep mode myself, so I was confused. A chipmunk? Like, a toy chipmunk? We don't have any of those. Uhhh...
I asked her ,"wha-? What are you talking about? What chipmunk?" And she said:
"MOMMY! LOOK! Right there! A chipmunk!"
She was gesturing wildly toward the kitchen (I should mention here that my house is laid out like this: family room, kitchen, dining room in a row). So there I stood, in the doorway, newspaper in hand, asking again what on earth she was talking about. I think I said, "what chipmunk? Where?"
"RIGHT THERE! IN THE DINING ROOM!"
And dudes, I kid you not - I turned around and saw a FREAKING CHIPMUNK streak across my dining room.
Hijinks ensued, I can tell you that much. Hubs jumped out of bed and immediately closed off the bedrooms (which are off the dining room). I got the broom. Hubs got a bucket. Don't ask me what our plans were. We just grabbed what seemed like logical chipmunk removal items. Daughter grabbed the broom and proceeded to try to find the chipmunk and, I don't know, perhaps sweep him to death. We mostly stood around, spinning in circles and shouting, "there he goes!"
Finally, we got Daughter to calm down and sit in the kitchen to eat her cereal, promising that she could watch for Mister Chipmunk (as she called him) from her chair. Once it got quiet, Mr. C came out of the dining room and hid behind the stove. I got the flashlight and coaxed him out of there after propping the front door open, and he crept around the perimeter of the kitchen and shot out the door.
It was one heck of a morning.
The question we have is, where did the little bugger come from in the first place?!? Ay-yi-yi. Never a dull moment.
Thursday, March 13, 2008
little stinker

Today we were playing with Daughter's pegs. I made a pattern in one row, and she copied it. She found this to be great fun. One time she made 3 perfect copies, then just stuck the pegs in any old way on the last row.
Me: Sweetie, that's not the same pattern. What 'cha doing?
D: Oooooohhhh. That's wrong. (Takes pegs out.)
Me: It's ok, try again!
D: I don't want to make a mistake again! (Makes growly noises of frustration.)
(Discussion ensues regarding the nature of making mistakes vs. just mixing things up.)
D: Ok mommy, I will try it again! (Proceeds to quickly stick all the pegs in exactly the right places.)
Me: Hey, were you mixing them up on purpose?!?
D: Hahaha! Now I'm doing it right ON PURPOSE!
Tuesday, March 11, 2008
an almost finished garment
I tried several times to write this post yesterday, but Blogger refused to accept pictures so it had to wait until today.
Also, wow, how did a whole week go by?
Anyway, I've been working on Daughter's Easter dress a little at a time, and it's mostly finished:

It has no buttons right now (just pins holding it together down the back) and that ribbon is not attached - I just wanted to see what it will look like.
Here's the back:

I wanted to hang it up for better photos, but Daughter was sleeping when I took them and it wasn't worth trying to sneak into her closet to get a kid-size hanger. So it looks nicer when it's hanging up or being worn, but you get the idea.
Last night I got her to try it on and she looks adorable in it. I picked just the right size and it fits well. Hopefully during today's nap I can get the buttonholes made and sew on the buttons. Then I just need to somehow affix the ribbon to the dress - crochet loops at the side seams, maybe?
It does need a slip of some sort (I chose against lining the actual dress). I got some batiste at Joann's last week (and is it me, or did Joann's used to have nice, 100% cotton batiste but now only a cheesy cotton/poly blend?), so I will probably make both a ruffled half-slip and a full slip to see which looks better. A full slip might be wise as it's still wicked cold here.
It feels good to get something (almost) finished.
Monday, March 03, 2008
i get by with a little help from my friends
I have to start out today by saying a prayer of thanks for this beautiful day. Winter is set to return tonight, but today it is in the 60s (!!!) and the sun is blazing. This morning we actually played outside - didn't even need hats - and Daughter's obvious joy at stomping around in the rapidly melting bits of snow was infectious. We sat on the porch for quite awhile and soaked in the sunshine, and it was just wonderful. Yes, we go back to rain/snow/sleet for several weeks now, but I have a feeling this is the day we start heading for SPRING! Woo hoo! Can't come soon enough for this gal.
And now a question for my sewing homies: my last post was about Daughter's Easter dress - scroll down for a refresher on that. As it was so lovely today, I chose to ditch my chores for naptime and sit in front of an open window, sewing in the breeze. I got most of the bodice done but quit when I realized I don't have matching thread to topstitch with. Whoops. Guess I'm going to Joann's tomorrow.
Anyway, I was thinking about the skirt, and more specifically how to give the skirt a bit more body. The gathers at the waist will do their part to make it stand out a bit, but as it's just cotton calico it doesn't have much...oomph.
My thoughts are to either line the skirt portion with something (batiste?) by basically making a second skirt, stitching it to the bodice along with the dress fabric, hemming it up shorter than the dress, and then tacking it to the seam allowances with little crochet thread loops (like you see in store bought dresses/skirts), OR make a slip with a ruffly bottom. I have this pattern and could probably fudge it down to a size 2 (viewB). I thought of making the half-slip but Daughter still has a bit of that poochy toddler belly and I don't think it would stay at her waist.
So I could use any suggestions you have. Thanks, peeps!
Subscribe to:
Posts (Atom)
